(Originally published Wednesday January 31, 2007)
The Set-up
There are a few things that you have to do before play starts. If you’re at a Mahjong parlor then most of this is obselete, but if you are playing out of the comfort of your own home this chapter is absolutely necessary.
The Seating:
There are many ways to decide where to sit. The most simple, of course, is to just sit down somewhere. That’s fine. If you want to make things more complicated, wait for the next update.
Mix up the tiles:
Ideally no one will know which tiles are which when they are being mixed and things are getting set-up. But have you ever tried to wash the tiles without turning ANY over? This is not very realistic. That is why most competitions in Japan use automatic tables to mix the tiles and build the wall for them. In a friendly game, it is unnecessary to turn every tile upside-down before mixing. Just have fun washing the tiles and build the wall quickly to get more games in.
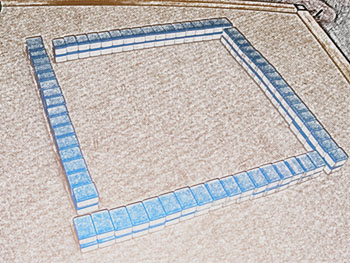
Building the Mountain:
After the tiles are good and mixed, the Mountain (wall) must be built. The Mountain has 4 sides and 2 tiers. Divide the 136 tiles up and you get 17 tiles in each tier for 34 tiles in each side. To do this, each person should line up 17 tiles in front of them. This time make sure they are upside down!
First Row of 17

Then line up 17 more right in front of those.
Two Rows of 17
![]()
Move the front row out a few inches and then, push in with your pinkies and steady the 2nd row with the rest of your fingers. Slide it close to the first row and then, all at once, lift it up and set it on the first row. Sound hard? Just practice a couple of times. It looks cool and makes for a great trick to show off to the new players. (In time they will learn how to do it too and it won’t be so fancy anymore). If you just can’t get it, just put half of the row up at a time.
The Dealer:
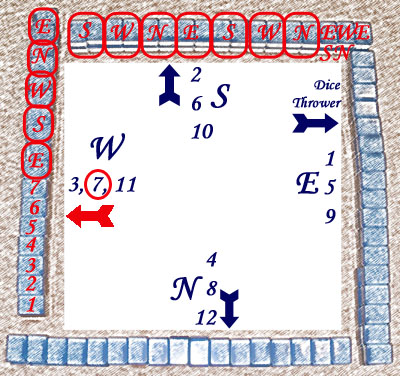
Since there are different strategies depending on who starts as the dealer, it's best to leave the first dealer up to chance. This is where your trusty dice come in.
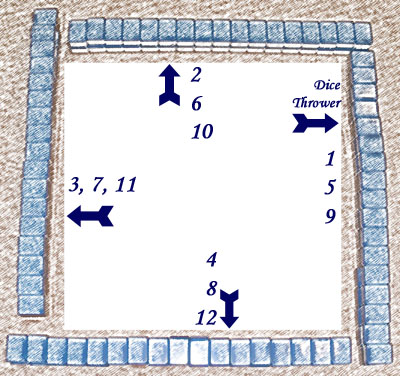
After everyone has sat down in a seat, someone rolls the dice. The person who rolled uses the total number shown on the two dice and starting with his/herself, counts off counter-clockwise, until they have counted off to the number shown on the dice. The person they end on is the dealer. If you are unsure about the person’s dice-rolling ability, go ahead and let the person who was chosen roll one more time and repeat the process. The more times you roll, the more you fight off bad dice-rollers!
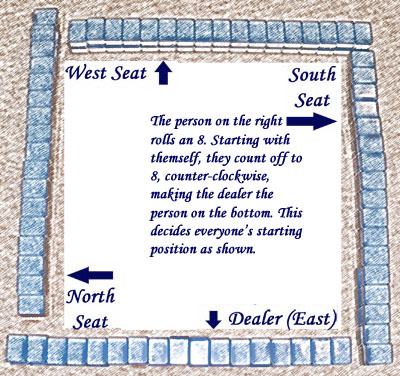
Sound complicated?! But wait! It’s simple! Since there are 4 players, if you roll a 1-5-9, you will be the dealer. If you roll a 2-6-10, the person to your right will be the dealer. If you roll a 3-7-11, the person across from you is the dealer and if you roll a 4-8-12, then the person to your left is the dealer. Well now, that is not so complicated.
The Deal:
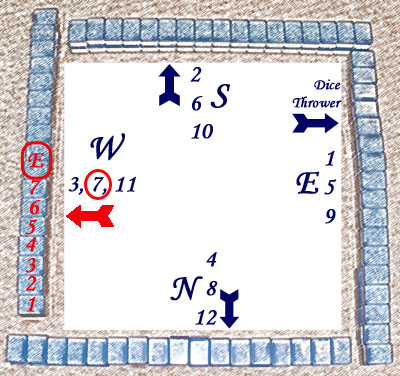
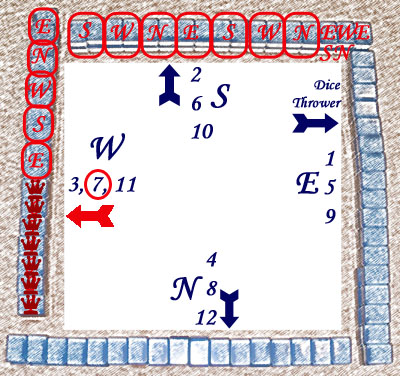
Now that we chose the dealer, it’s time to get down to business. The dealer has to start the dealing. This is the last time to use the dice until the hand ends. The final decided dealer will roll the dice once, this time to choose where to cut the Mountain. Roll the dice and count the same way you did when you chose the dealer. See the Wall of tiles in front of the chosen one? That's where you start taking tiles from. But wait! Don’t take them from the edge! Start from the right-hand side of their (or your) wall and leave the number of columns that show on the dice. So if you rolled a 7, you would start with the 8th column from the right side of the wall of the person facing you.
The dealer starts by taking 2 columns (4 tiles) and the person to their right takes the next 4 (the play goes counter-clockwise, but the Mountain is taken in a clockwise motion). Everyone takes turn taking 4 tiles each until each person has 12 tiles. Next, each player takes 1 tile. This is when the play starts.
The King’s Tiles (Dead Wall):
The last 14 tiles in the wall will always be left at the end. These are called the King’s Tiles and us humble servants are not allowed to touch these unless we show our worth with a Kong (more about that later)
The Bonus Tile (Dora) Indicator:
Don’t mistake this with the Honor Dragons I mentioned earlier. Look at the King's Tiles. Since the edge tile might flip over on accident, put it down. Now skip the next tile on the top row and turn over the one next to it (if all tiles are double-tiered, this will be the third tile on the top). This is the Bonus Tile (Dora) Indicator. Whichever tile follows this is the Lucky Dragon. If you use one in your hand, it increases the value!! More about that in the point section. For now, just remember to flip it over!!! Oh, and make sure to check it before you start throwing away Dora by mistake!!!
Now that you're all set up, go to Chapter 3: The Goal to learn the point of it all!!
